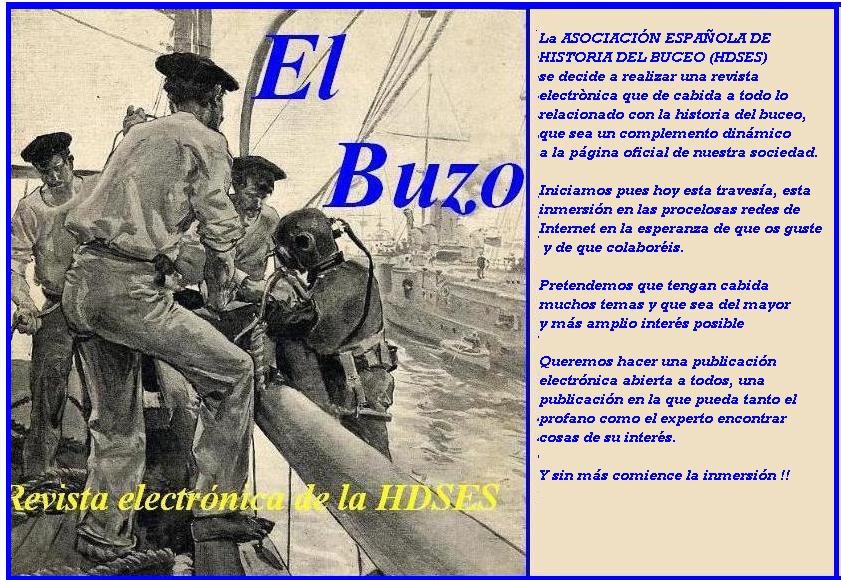
"El mar no pertenece a los déspotas. En su superficie los hombres podrán aplicar sus leyes injustas, reñir, destrozarse unos a otros y dejarse llevar por horrores eternos. Pero, a diez metros bajo el nivel de las aguas, cesa su reinado, se extingue su influencia y desaparece su poder. En el fondo del mar sólo existe la independencia. Ahí no reconozco voz de amo alguno. Ahí soy verdaderamente libre..."

Capitán Nemo
Mostrando entradas con la etiqueta Cosas para los niños. Mostrar todas las entradas

viernes, 26 de abril de 2019

Profundidades máximas alcanzadas en los mares

40 metros. Es la profundidad máxima a la cual está permitido sumergirse durante una excursión subacuática de buceo.

93 metros. Un poco más abajo se encuentra el lugar, donde fue hallada la nave británica “Lusitania”, que naufragó en 1915. Un hecho interesante: la longitud de la nave es de 240 metros y esto significa que si la ponemos de popa, una mayor parte se encontrará sobre la superficie del agua.

 100 metros. Bucear a una profundidad de 100 metros puede ser mortalmente peligroso pues el nitrógeno,se vuelve venenoso y a la par es absorbido por los tejidos del cuerpo.

214 metros. Pero el peligro no detuvo al ser humano llamado Herbert Nitsch, quien estableció un récord al bucear 214 metros de profundidad y sin equipo de buceo. Sus piernas y cabeza fueron atados con objetos pesados para que el buceo fuera bastante rápido.

250 metros. A tal profundidad navegaban los submarinos alemanes durante la Segunda Guerra Mundial.

332 metros. Bajaremos más. Aquí Ahmed Gabr estableció otro récord de buceo, pero esta vez con equipo de buceo.

500 metros. La profundidad máxima a la cual puede estar la ballena azul: la criatura más alta del planeta. Esta también es la profundidad en la cual se puede sumergir de manera segura un submarino nuclear.


535 metros. La profundidad máxima, a la cual puede sumergirse el pingüino emperador.

750 metros. Aquí se puede encontrar al pulpo gigantesco, que sabe cambiar el color de su piel a rojo cuando está enojado.

828 metros. A esta profundidad podríamos alcanzar el rayo de la torrea volteada de Burj Khalifa, el edificio más alto del mundo.


1 000 metros. La luz de la superficie no puede alcanzar este punto, por eso más abajo es completamente oscuro. La presión es la misma como si estuviéramos en la superficie de Venus, es decir nos aplastaría rápido. Aquí también comienza la zona de hábitat de los calamares gigantes.

1 280 metros. La profundidad máxima a la cual se puede sumergir la tortuga laúd gigante. Ella puede estar bajo el agua durante 85 minutos.

2 250 metros. A esta profundidad los cachalotes cazan a los calamares gigantes. De tales batallas los cachalotes a menudo tienen cicatrices.

3 800 metros. Aquí se encuentra el “Titanic”,  barco del cual ya sabemos hasta el aburrimiento su historia.


4 000 metros. La zona abisal, aquí habitan animales aterradores, tales como los quiasmodóntidos, bathypterois y lophius.

4 267 metros. Es la profundidad media de todo el océano, por eso aquí se puede encontrar el fondo. Pero nosotros bajamos a la fosa, y significa que el fondo todavía está lejos.


6 000 metros. Nos encontramos en la zona hadal, llamada así en honor al dios del mundo inferior de los muertos, Hades, o como también lo llaman, Aida. La presión aquí es como 50 aviones de pasajeros Boeing 747, que se encuentran encima de tu cabeza.

6 500 metros. Es la profundidad máxima a la cual se sumergía el dispositivo DSV Alvin, que es el submarino para investigar, el cual ayudó a encontrar el “Titanic”.

6 762 metros. Aquí se encuentra el SS Rio Grande, la nave que se hundió durante la Segunda Guerra Mundial. Se considera el barco hundido a la mayor profundidad en el mundo.

8 848 metros. Aquí alcanzaríamos la cima del Everest puesto del revés.


10 898 metros. La profundidad a la cual se sumergió el director James Cameron en 2012. La sumersión duró 3 horas durante las cuales el director observaba un mundo completamente oscuro a su alrededor y llevaba la filmación en 3D para reproducir las grabaciones obtenidas en la película popular fantástica Deepsea Challenge 3D. Cameron fue la tercera persona que se arriesgó sumergirse a una profundidad de 11 kilómetros y la primera que lo hizo a solas.

10 916 metros. La profundidad a la cual se sumergió en 1960 Jacques Piccard y Don Walsh. Ellos realizaron la sumersión y estuvieron allí aproximadamente 20 minutos, después de que los vidrios del submarino empezaran a temblar, tuvieron que subir. Esta sumersión duró 5 horas.

10 994 metros. Alcanzamos el abismo de Challenger, el cual se considera como el más profundo de todos los puntos más profundos estudiados de nuestro planeta.


??? Sin embargo, sabemos que las profundidades oceánicas han sido estudiadas menos que la superficie de Marte, solamente un 5 por ciento. Por lo tanto, como creen muchos científicos, hay lugares más profundos del abismo y solamente la naturaleza sabe qué se oculta a esta profundidad.

domingo, 29 de diciembre de 2013

Diorama Madelman Buzo de Jose Luis Mendez-Vigo Alvarez

El artista Jose Luis Mendez-Vigo Alvarez, dioramista, ha realizado esta reproducción de un buzo de casco con equipo autónomo . Para ello se ha valido de un  muñeco Madelman a escala 1/10, "Customizado" para la escenografía resultante.

Es una maravillla tanto la factura del mismo como la composición. 

Enhorabuena al artista !!

Fuente: Madelman Custom


domingo, 6 de octubre de 2013

Recortable de buceo 1966

Fotocopiar un poco ampliado en cartulina, o pegarlo en una y a recortar !! (Es réplica de un recortable original de 1966)

sábado, 27 de octubre de 2012

Una réplica de casco de buzo en resina

Por si alguien quiere un casco de buzo, pero no dispone de fondos necesarios, en esta páguina venden una réplica en resina preciosa y muy bien lograda para decorar. También es un juguete ideal para los niños o para un disfraz.


Deep Sea Diver Helmet Replica
 
Deep Sea Diver Helmet Replica
click on image to enlarge
Made of resin
Finish: antique brass finish
Dimensions: 15"W x 14"D x 16"H (38 cm x 36 cm x 41 cm)
Weight: 10 lbs (4.5 kg)
Item No. W415
This Item is an Identical Museum Reproduction
$179.00
€138.42 £111.19
Quantity:
Antique Deep Sea Diver Helmet Model Sculpture Decorative Replica. This faux antique is virtually indistinguishable from those that go for up to $25,000 at auction! Our highly collectible, antique replica diving helmet sports just enough gentle dents to look like it’s seen a few dives off a coral reef itself! Complete with actual glass portal windows and authentic manufacturer’s stamp, our life-sized, quality designer resin helmet is hand-painted in a antique brass finish, making it difficult to distinguish from the original. This helmet is a decorative statement piece perfect for a diver or any nautical collector entranced by the treasures of the sea. Replica Helmet is for decorative purposes only - not wearable.

lunes, 8 de octubre de 2012

Disfraces de buzo


http://www.elope.com/estylez_item.aspx?item=250450

Sencillo disfraz de buzo y otros que no tanto


Paso a paso cómo hacer un disfraz de buzo muy elaborado !!


 http://www.instructables.com/id/Deep-sea-diver-alien-victim-costume/


Final 2.jpg
Deep sea diver.


Step 22) The helmet and collar

Helmet 1.jpg


To make your diving helmet, you'll need the following bits and pieces:

- Two large plastic mixing bowls*.
- An assortment of plastic flower pots and drainage dishes.
- A plastic yoghurt pot.
- A piece of paper with a straight edge.
- Thick, stiff card.
- About 1.5 metres of plastic aquarium tubing.

For the collar, you'll need:

- Some flexible foam scraps.
- A covering material that can be painted, e.g. artificial leather.

You'll also need:

- Spraypaints in the following colours: Black, bronze, copper.
- A marker pen.
- Plenty of glue. You will probably need superglue as well as ordinary craft glue.
- A sharp craft knife.
- Scissors.
- A file.
- Masking tape.


*Put rim-to-rim, these bowls should make a rough sphere large enough to comfortably fit your head. One of the most entertaining parts of this Instructable was going to the kitchenware department of a large shop and trying on different bowls while trying to avoid the judgemental glares of the sales assistants.

Step 3Prepare the portholes

Helmet 2.jpg
Helmet 3.jpg
Helmet 4.jpg
Helmet 3a.jpg
Helmet 4a.jpg


Helmet 5.jpg


Lay out your bowls and flower pots so that you can see how your helmet will eventually be formed.

The two bowls will make the main sphere of the helmet, while the flower pots and drainage dishes will provide the portholes. With a little bit of imagination, it's starting to look like a helmet before you've even begun... Failing that, skip forward a few steps to see how it will look once it's finished.

At least two of the portholes will be lying over the seam where the two bowls' rims meet. In order for the portholes to lie flush against the surface of the bowls, you may have to cut small slots in the rims of the pots/dishes.

If you need to trim one of your flower pots down significantly, as I did, you'll need to do so in an even fashion. Take a piece of scrap paper with a straight edge and form it into cylinder, then tape it around the pot. Use this as a guide to mark where you will have to trim the pot, then cut it to size with scissors.

There, isn't that looking more like a helmet?

Step 4Still fiddling with portholes

Helmet 6.jpg
Helmet 7.jpg
Use scissors to cut holes in your drainage dishes as required.

Use circles of thick card to fill in any missing bits of porthole, then file away any rough edges.

Cut short segments of plastic aquarium tubing and glue them into your portholes to provide bars.

Step 5Make the helmet rim

Rim1.jpg
Rim 2.jpg
Watercooler.jpg
Rim 3.jpg


You're going to need some way to get your head in and out of this helmet, so let's make a head-hole with a rim.

Bend several thin strips of card into a hoop just big enough to fit your head through, then glue them together.

Place the hoop on the base of the bowl which will form the lower half of your helmet. Draw around the hoop'sinside with a marker pen and cut away where you have marked. Do this slowly, as plastic bowls are often prone to shattering.

While you're in a slicey mood, cut away holes in the bowl for the portholes as well.

When you're sure you don't need to do any more cutting, glue the two large plastic bowls together. Once the glue has dried, glue on the rim you made earlier.

Now would also be a good time to trim your yoghurt pot into a short cylinder and glue it to the helmet. Add a circular card base to the yoghurt pot to cover up any unsightly recycling symbols that might show through the paint.

Don't glue the portholes to the rest of the helmet yet, as you're going to paint them separately. You should now have something that, if worn on your head, makes you resemble a watercooler. Hey, there's an idea for next year's costume...

In the picture below, I'm also wearing the diving suit collar. We'll talk about how to make that in the next step.

Step 6Construct a collar

Collar 1.jpg
Collar 2.jpg
Collar 3.jpg
Collar 4.jpg


Obviously you can't just stick a plastic bowl over your head and expect to survive in the perilous depths of the ocean. To make a convincing deep sea diving suit, you're going to need a collar.

The basic collar is made out of four pieces of recycled foam, originally from packing material and camping mats.

Cut one piece into an ellipse, then remove a small section of it. This way, when you join the cut ends together, the piece will become slightly conical rather than completely flat. It's a small detail, but it makes for a better shape.

By trial and error, trim a second piece of (thicker) foam so that it makes the vertical section of the collar. You should end up with something that looks like a neck brace.

Use long, thin scraps of foam to make the rim of the collar. Hold all of this together with tape or pins for now, then try it on to make sure it fits.

If you don't have a mannequin to help you, it's handy to have a cushion or a pillow to support the collar while you're working on it.

Step 7Cover the collar

Collar 5.jpg
Collar 6.jpgCollar 8.jpgCollar 7.jpg
Collar 10.jpgCollar 9.jpg


Disassemble the collar and use the pieces as templates for the artificial leather covering.


Be sure to cut out pieces of fabric a few inches larger than the original foam pieces.

Now reassemble the collar with its new covering, this time gluing it together as you go. Start by gluing fabric to the foam ellipse and trimming it to size.

Glue the foam collar on top of this, then wrap it in another piece of fabric. To tidy up the top of the collar, cut a series of flaps into the fabric and fold them over to the inside of the collar. Then line the inside of the collar with another long strip of fabric.

Glue the foam rim in place and glue dozens of small strips of fabric to it, as shown below. Once these have been glued down, you can fold them over to cover the lower border of the collar in the same way you covered the upper border.

Step 8Paint the helmet and collar

Paint 1.jpg

Paint 6.jpg
Paint 3.jpgPaint 2.jpg
Paint 5.jpgPaint 4.jpg


Now that you've assembled your helmet, portholes and collar, you can paint them.

Start with an undercoat of matte black spraypaint for everything, then paint on the bronze details. Also paint the portholes entirely bronze.

Once this has dried, mask off the bronze areas with tape and spraypaint the rest of the helmet and collar copper.

If it all looks slightly too new and shiny, spray a light mist of black spray over it to give it a duller, more worn look.

Step 9Glue the portholes on

Helmet.jpg
Use superglue to attach the painted portholes to your helmet.

Stand back and admire your handiwork.


Step 114) Other bits and pieces


To complete the costume, you'll need the following bits and pieces:

- A boiler suit.
- Gloves.
- A weight belt.
- Weights for your shoes.
- Fake blood (optional)

For the boiler suit, choose one which is a neutral beige, brown or orange. Make sure it is very baggy and  has a convenient opening down the front so that your Alien can pop out. I managed to find a jacket with popper fastenings (i.e. snap fasteners or press studs) down its front and a matching pair of trousers. That is to say, the trousers matched in colour. They didn't come off suddenly using popper fastenings. It wasn't that sort of a party.

Almost any gloves will do, as long as they're not of a very inappropriate colour. Lurid pink gloves might detract from the authenticity of the rest of the suit.

To make a weight belt, cut several pieces of foam into roughly rectangular blocks and whittle away the corners so that they resemble large smooth pebbles. Then spraypaint them in black and grey and tie them onto a canvas belt with scraps of leather or brown parcel string.

To make weights for your shoes, cut some angular shapes out of card and spraypaint them silver and black. Then just attach them to the surface of your shoes with double-sided tape.

There are many recipes for fake blood available on this site and elsewhere on the internet, so I won't go into how to make it here. I chose not to use any for my costume, as I wanted to preserve my jacket for another costume. Opting not to have fake blood all over me also meant that I didn't make a mess of other people's costumes and that my Alien was always a surprise when it popped out.


Step 125) Putting it all together


Final 1.jpgHalf on.jpg
Final 2.jpg


Most of this costume's final assembly is self-explanatory, but sorting out the fake-arm-and-helmet combination is rather fiddly. If you just try to attach the helmet directly to the arm, it will tend to fall off repeatedly.